

Challenge
Customers that don’t have an IDQ instance linked with their Axon environment may still want to leverage Data Quality Scores in Axon to assess the health of their data. Keeping these metrics up to date in Axon without having the IDQ rules results directly linked can be challenging to manage. The Axon API was created to enable the update of these scores from simple and easy to configure API calls.
Description
This Best Practice walks Axon Administrators and users through the process of using SoapUI to make API calls to Axon (v7.1 and later) to update Data Quality Scores. The screenshots depict a generic process where users will only have to input their own details to make the calls work for their environment.
Step 1 – Authenticate
Before making REST API calls, a user must authenticate in Axon and get an access token. The use of access tokens allows a user to make secure API calls without having to authenticate for each call. To get an access token, either use Axon login credentials or a refresh token.
Enter the following parameters in the REST API client to connect to the Axon host and receive the access and refresh tokens:
Property |
Value |
URL |
HTTP(s)://<Axon_host_name>:<Axon_port_number>/api/login_check |
Method |
POST |
Input Parameter username |
Your Axon or LDAP login user name |
Input Parameter Password |
Your Axon or LDAP login password |
After entering the parameters and making the API call, the user will receive the access token and refresh token in the response body:
Property |
Value |
token |
The access token |
refresh_token |
The refresh token |
Setting-up Authentication: SoapUI
Open up SoapUI and create a new empty project.
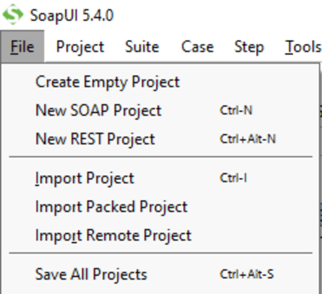
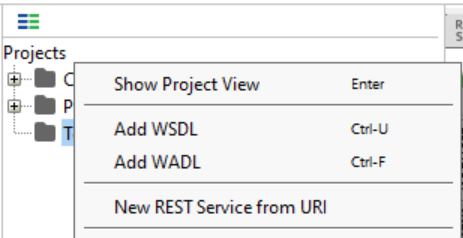
Give the project a name then right-click on the newly created project and select, “New REST Service from URI”
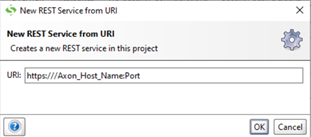
In the pop-up window input the full URL for the Axon instance and select OK.
The left side of the screen contains the Project, Rest Service, and Method.
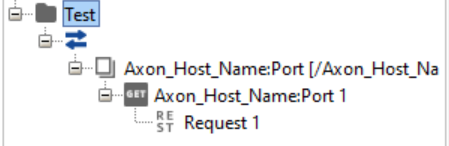
Double click on Request 1 to open it up in the window on the right.
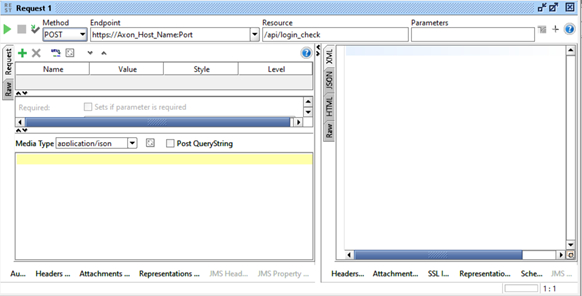
Edit the Method, Endpoint, and Resource to be POST, <YOUR AXON URL>, and /api/login_check so it looks like the image below:
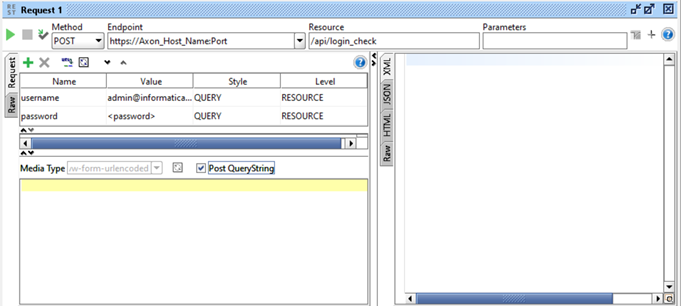
Ensure the ‘Request’ tab is selected on the top left of the left pane and press the green plus button to add two requests with the details shown below:
Name |
Value |
Style |
Level |
Username |
QUERY |
RESOURCE |
|
Password |
<password> |
QUERY |
RESOURCE |
Ensure the checkbox next to Post QueryString is selected. The screen should look like the image below:
In the top left, press the green play button to run the API Call. The API will submit the username and password and return a token and refresh token. In order to see this output click the JSON tab of the right pane.
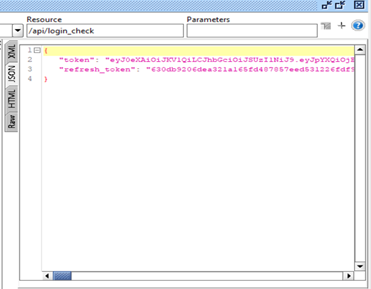
If both tokens are returned the call was set-up and run correctly. The next steps are to use the token from this first call in later calls, in this case we will use it to update the DQ Scores in Axon.
Step 2 – Update DQ Scores
Use a REST API client to update DQ Scores in Axon. This is often done when the Axon agent is not installed, the client doesn’t have an IDQ instance set-up, or the rules are referencing a different DQ instance.
Property |
Value |
URL |
HTTP(s)://<Axon_host_name>:<Axon_port_number>/api/v1/dqscorereport |
Method |
POST |
Syntax for the body search can be found in the Axon Rest API Guide along with examples.
{"data" : [{ "executionTime":"2021-06-13", "score":73, "exceptionCount":4675, "identity":"DQ-1", "dqReportProvider":"IDQ", "rowCount":"14078"} ]}
Setting-up Update Call in SoapUI
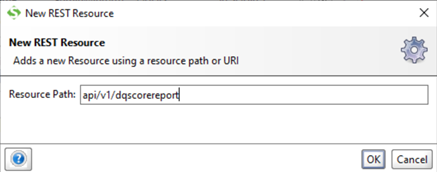
Right click on the URL that was created under the same project, and from the dropdown select New Resource.
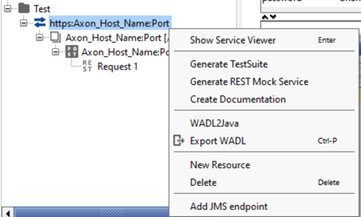
In the pop-up box, add the path for the new API call, in this case /api/v1/dqscorereport.
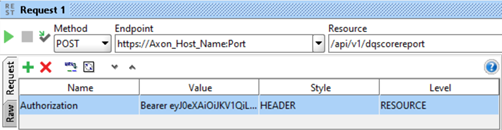
Edit the Method, Endpoint, and Resource to be POST, <YOUR AXON URL>, and /api/v1/dqscorereport so that it looks like the image below:

Click on the green plus icon to create a new request and give it the following properties:
Name |
Value |
Style |
Level |
Authorization |
Bearer <token from previous API Call> |
HEADER |
RESOURCE |
The request should look like the image below:
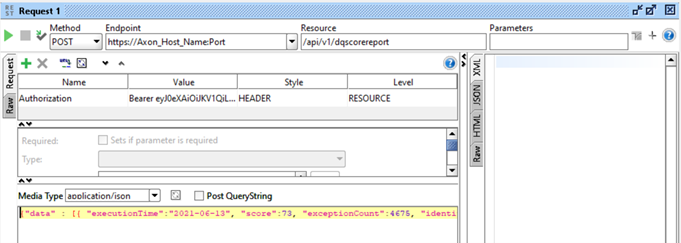
Next, add the API query to update the DQ Score in Axon. In the Body section paste the query string:
{"data" : [{ "executionTime":"2021-06-13", "score":73, "exceptionCount":4675, "identity":"DQ-1", "dqReportProvider":"IDQ", "rowCount":"14078"} ]}
- ExecutionTime: Time when the DQ rule was last run, this will update the time in Axon.
- Score: Percent of rows passing DQ rule. Given from results of the run in the outside repository.
- Exception Count: Number of rows failing the rule.
- Identity: Reference ID of the DQ Rule in Axon. This is needed in order to map the updates to a particular rule in Axon.
Ensure that application/json is selected as the Media Type in the dropdown menu. The request will look like the image below:
To run the API and update the score, click on the green play button in the top left. In the right pane select the Raw tab to view the output of the API run. Since values in Axon are being updated there will be no information available to view here, look for an output message ‘204 No Content’ to ensure that it ran successfully.
To view the results of the run, refresh or log in to your Axon instance and ensure the rule that was targeted has an updated score.
Refer to the Axon 7.0 Rest API Guide for information on this command or how to update multiple scores at once.